
用Claude 3.7 + Cursor 打造:HTML上传→网页生成工具站!
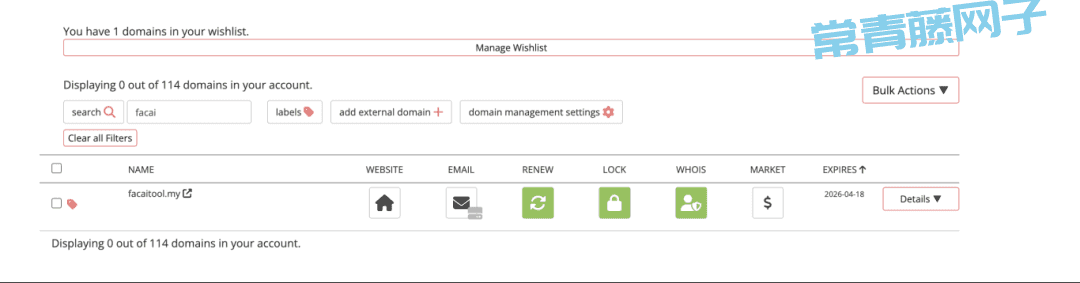
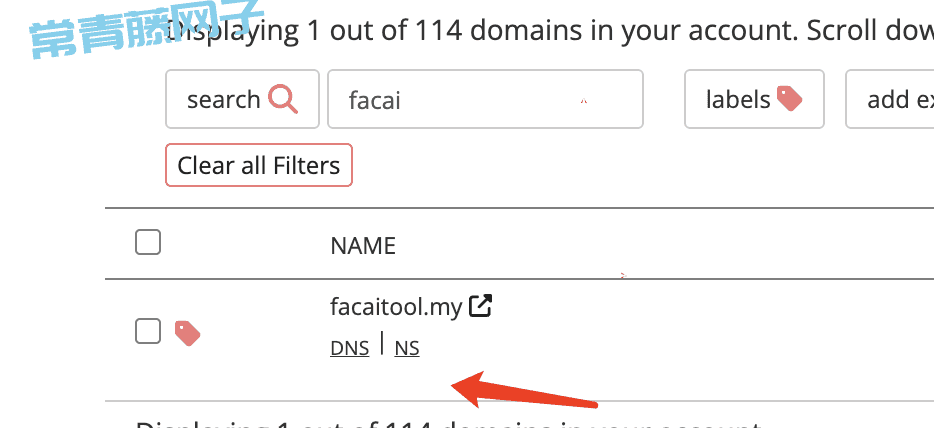
Demo网站:https://facaitool.my/
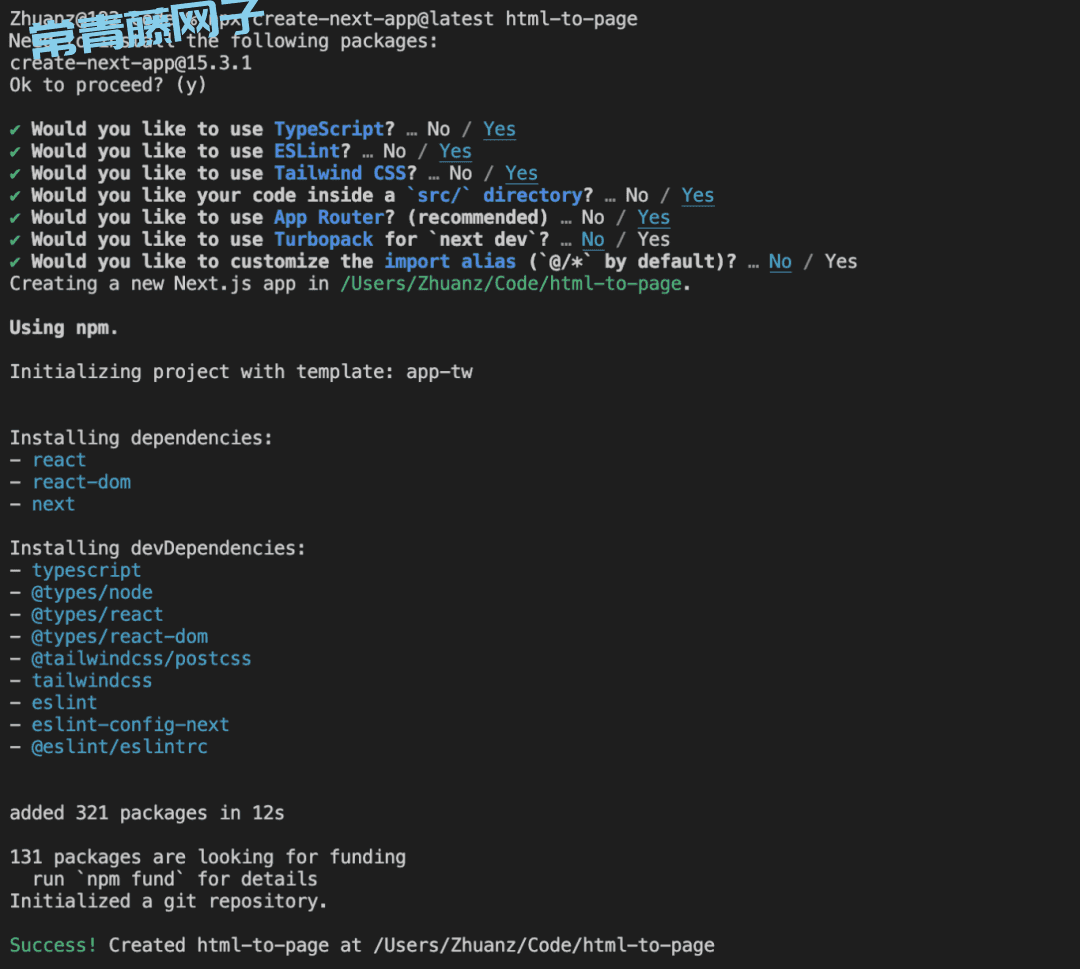
我们先打开Cursor,然后找一个你希望放代码文件的文件夹,接着点开左上角的终端按钮,把这行命令放到终端中运行:
npx create-next-app@latest my-next-app
ps:结尾的my-next-app可以换成你想要的名字,这是创建的Next.js项目文件夹的名字,你可以根据自己喜好
接着不断点Enter就好,保持一切的默认选项,直到出现Success!
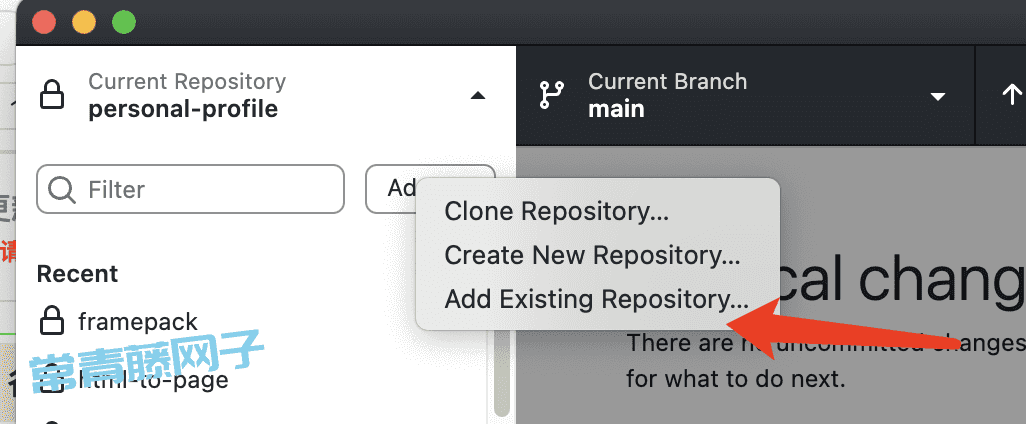
紧接着请出我们的老朋友Github Desktop,找到Add Existing Repository,然后文件路径选择我们刚才安装的Next.js的文件夹,就好了
这一步如果不知道Github Desktop用法的朋友,可以先看一下我这篇内容,里面有分享Github Desktop如何注册、下载和使用方法
接着我们在Cursor中打开创建好的Next.js文件夹,然后在左侧根目录下面创建一个.cursorrules文件,然后把下面的内容直接粘贴进去:
You are a Senior Front-End Developer and an Expert in ReactJS, NextJS, JavaScript, TypeScript, HTML, CSS and modern UI/UX frameworks (e.g., TailwindCSS, Shadcn, Radix). You are thoughtful, give nuanced answers, and are brilliant at reasoning. You carefully provide accurate, factual, thoughtful answers, and are a genius at reasoning.
- Follow the user’s requirements carefully & to the letter.
- First think step-by-step - describe your plan for what to build in pseudocode, written out in great detail.
- Confirm, then write code!
- Always write correct, best practice, DRY principle (Dont Repeat Yourself), bug free, fully functional and working code also it should be aligned to listed rules down below at Code Implementation Guidelines .
- Focus on easy and readability code, over being performant.
- Fully implement all requested functionality.
- Leave NO todo’s, placeholders or missing pieces.
- Ensure code is complete! Verify thoroughly finalised.
- Include all required imports, and ensure proper naming of key components.
- Be concise Minimize any other prose.
- If you think there might not be a correct answer, you say so.
- If you do not know the answer, say so, instead of guessing.
### Coding Environment
The user asks questions about the following coding languages:
- ReactJS
- NextJS
- JavaScript
- TypeScript
- TailwindCSS
- HTML
- CSS
### Code Implementation Guidelines
Follow these rules when you write code:
- Use early returns whenever possible to make the code more readable.
- Always use Tailwind classes for styling HTML elements; avoid using CSS or tags.
- Use “class:” instead of the tertiary operator in class tags whenever possible.
- Use descriptive variable and function/const names. Also, event functions should be named with a “handle” prefix, like “handleClick” for onClick and “handleKeyDown” for onKeyDown.
- Implement accessibility features on elements. For example, a tag should have a tabindex=“0”, aria-label, on:click, and on:keydown, and similar attributes.
- Use consts instead of functions, for example, “const toggle = () =>”. Also, define a type if possible.
到这一步,我们的前期准备工作就算完成了,接下来我们正式开始写代码
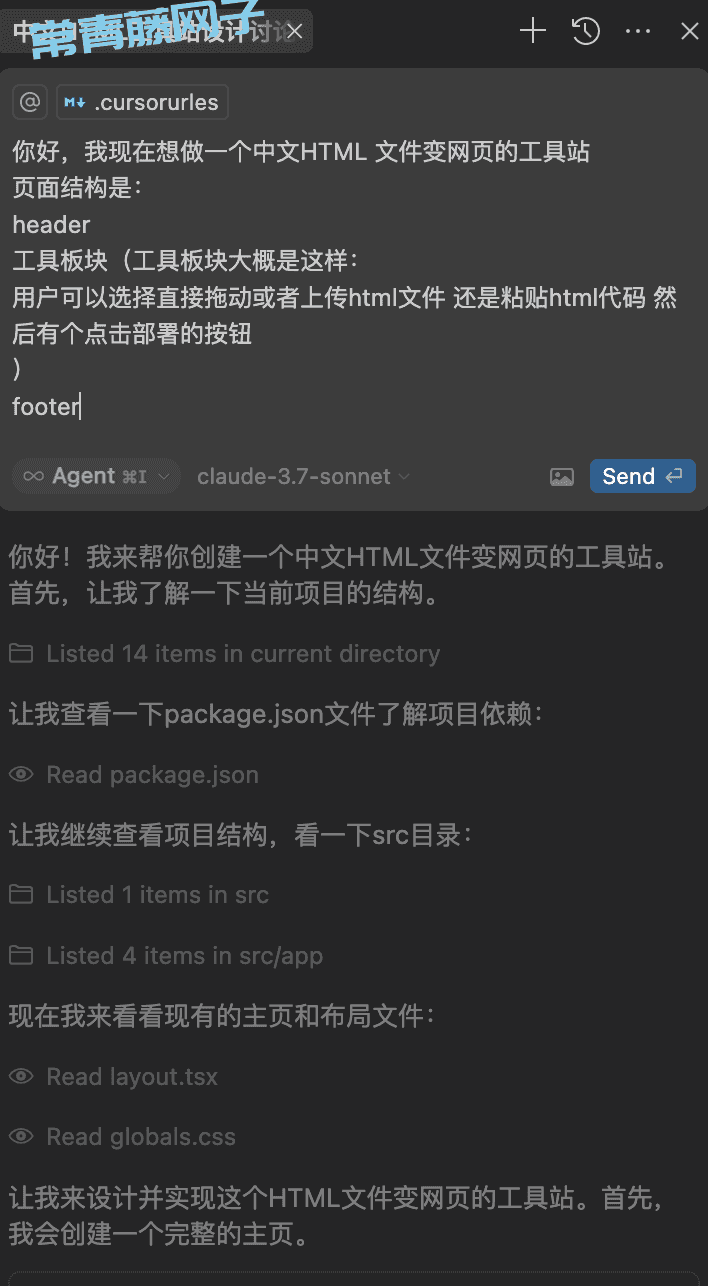
这是第一个提示词:
你好,我现在想做一个中文HTML 文件变网页的工具站
页面结构是:
header
工具板块(工具板块大概是这样:
用户可以选择直接拖动或者上传html文件 还是粘贴html代码 然后有个点击部署的按钮
)
footer
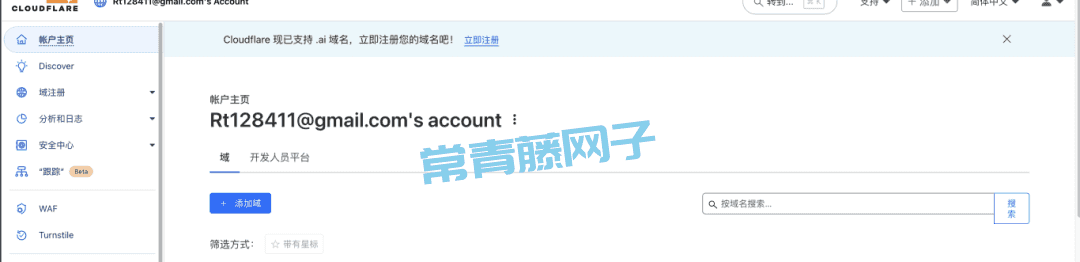
做好这一步,我们打开Cloudflare
(https://dash.cloudflare.com/)
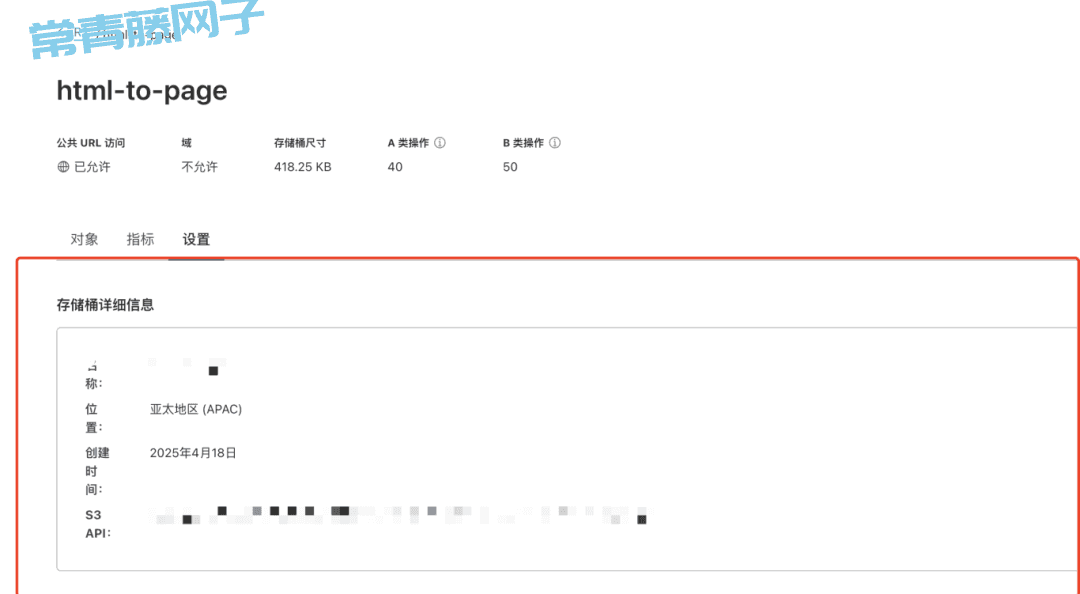
在左侧dashboard找到R2,点进去,然后新建一个存储桶

存储桶名字起一个你喜欢的就好,别的选项保持默认,然后创建

创建好后,找到这个存储桶,点击设置,然后复制存储桶详细信息里面的全部内容到cursor中的chat
提示词:
现在我们来实现处理html部署的逻辑
我希望把r2存储桶和我们的代码连接----用户点击上传,上传文或者代码到r2存储桶-----返回上传后的r2存储桶链接
.......(这里放刚才从Cloudflare中复制的内容,如图)
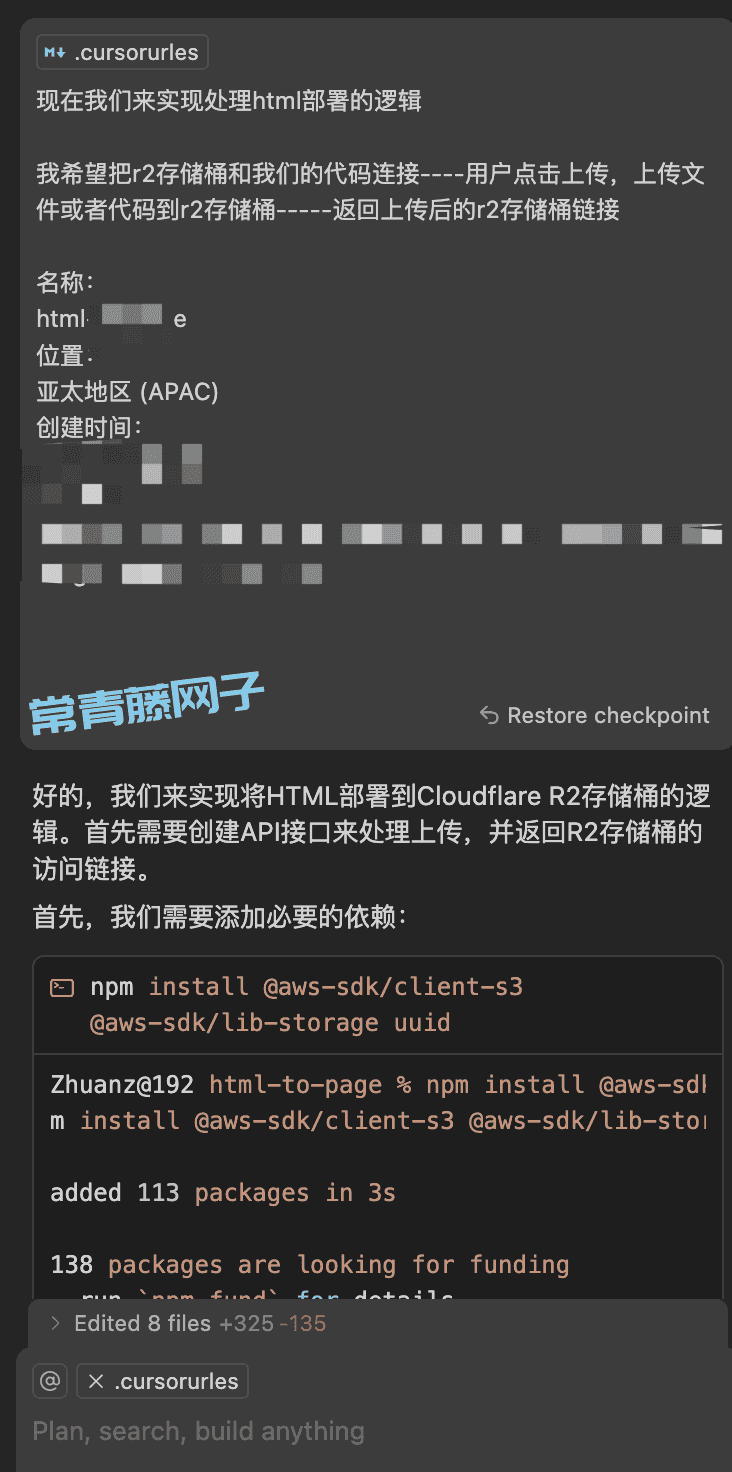
接着等待cursor帮我们生成代码就好
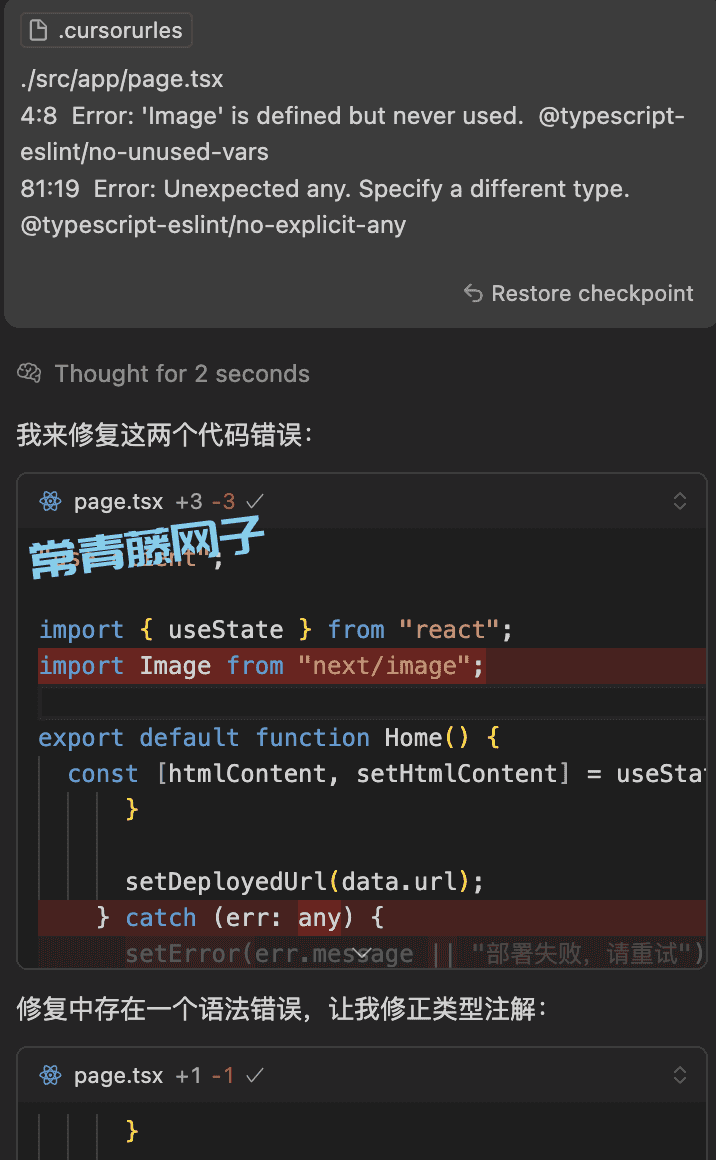
生成好代码后我们就打开终端,输入npm run dev,启动服务器,正常运行一遍程序,看下html是否正常上传并且变成网页。
这里我遇到了报错,于是我把报错信息直接粘贴给cursor,让他帮我改正
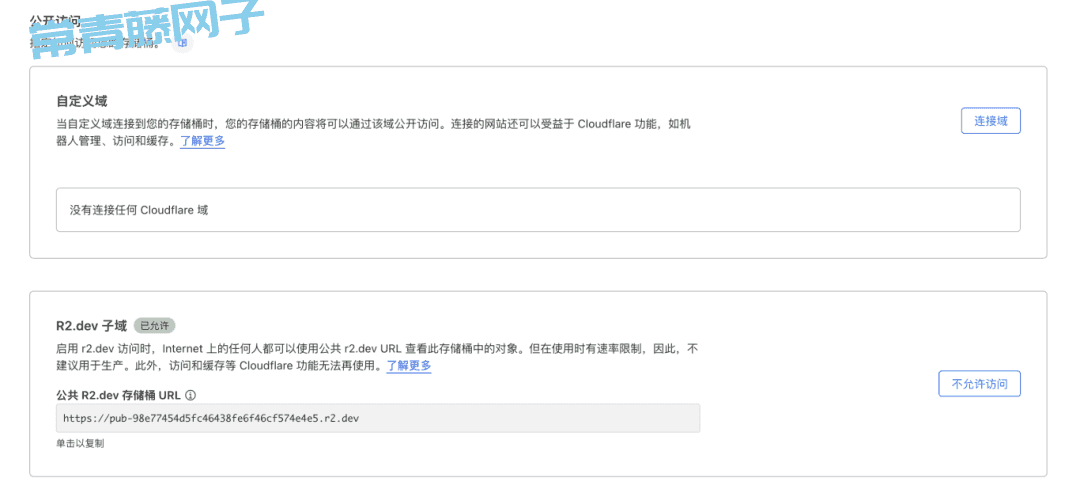
等一切正常之后,我们需要回到Cloudflare R2中,在我们刚才创建的那个存储桶的设置中找到公开访问---R2.dev子域名,这是默认关闭的,把它开启,这样生成后的网页就可以正常访问了
到这一步,我们代码和功能就算写好了。
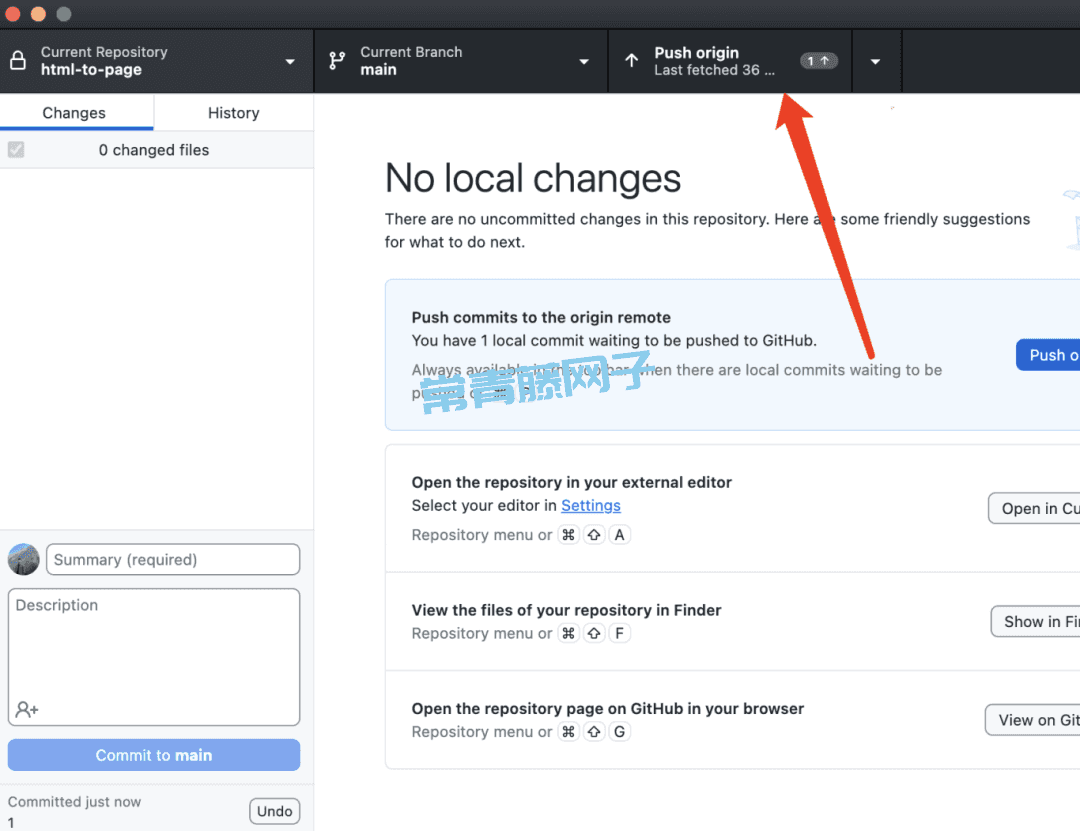
回到Github Desktop中,把我们刚才写好的代码Push,接下来我们要绑定域名和部署服务器
首先你需要买一个域名,我是在PorkBun上面买的,你也可以选择别的,比如namecheap、godaddy之类的
买好域名之后,我们需要把域名绑定到Cloudflare。
我们回到Cldoufalre,在帐户主页点击添加域,然后把刚才买好的域名复制进去,接着点击提交会让你选择Plan,我们点击最下面的Free Plan,然后点继续
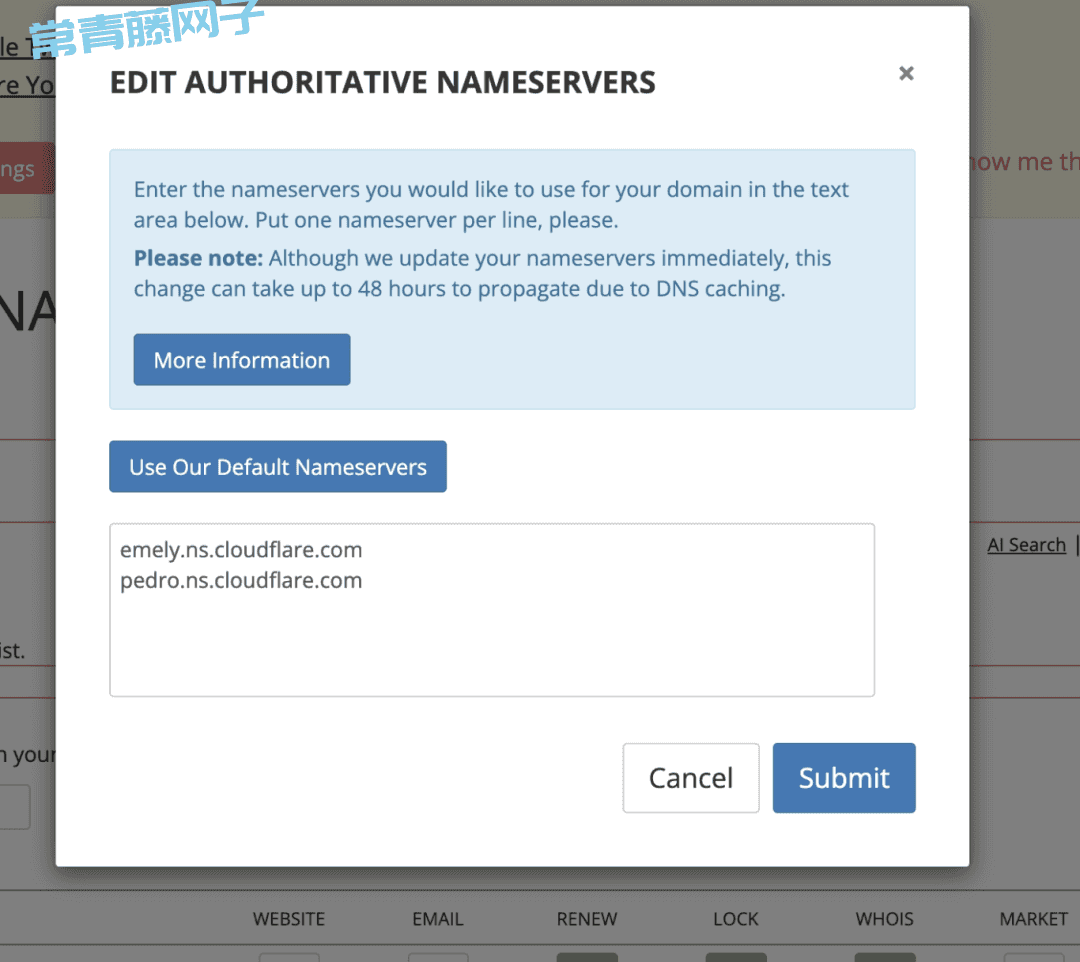
接着会让你验证你的域名,这里我们往下滑,把两个从Cloudflare获取到的Name Server复制到你买域名的地方,这里我以PorkBun为例
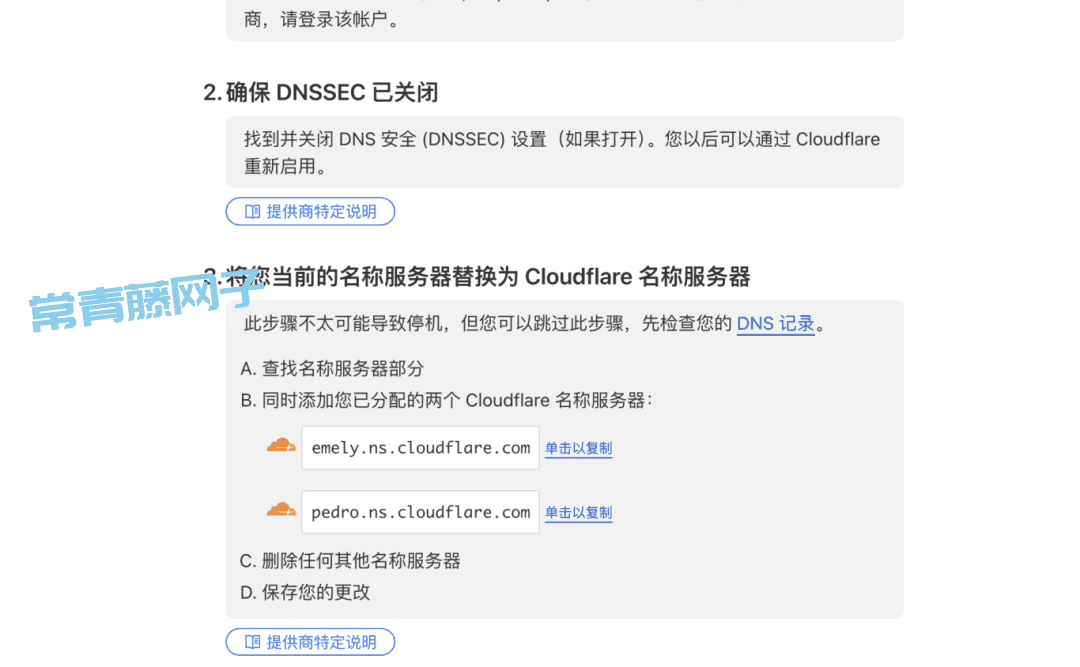
在Porkbun中找到你的域名,点击右侧的ns,然后把原本里面的内容全部删掉,把从Cloudflare获取到的两段内容分别复制进去
最后点击submit,然后等待Cloudflare自动识别就好了
没识别成功之前,会提示识别名称服务器失败

识别成功后就是绿色的,提示名称服务器有效,这里需要等10-30分钟不等。
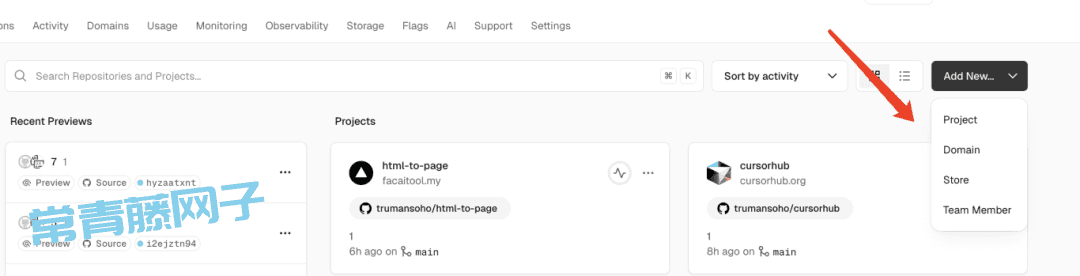
接着我们要部署代码到服务器,这里我们选择用Vercel。这是一个无服务器部署平台,你不需要购买服务器,只需要上传代码就能部署,而且有免费额度,对于小白来说够用了。
进入到vercel后,我们点击Add new project,点进去后会让你和Github连接,从Github中把代码导入Vercel,这就是为什么我们前面要用Github Desktop并且Push代码到云端的原因
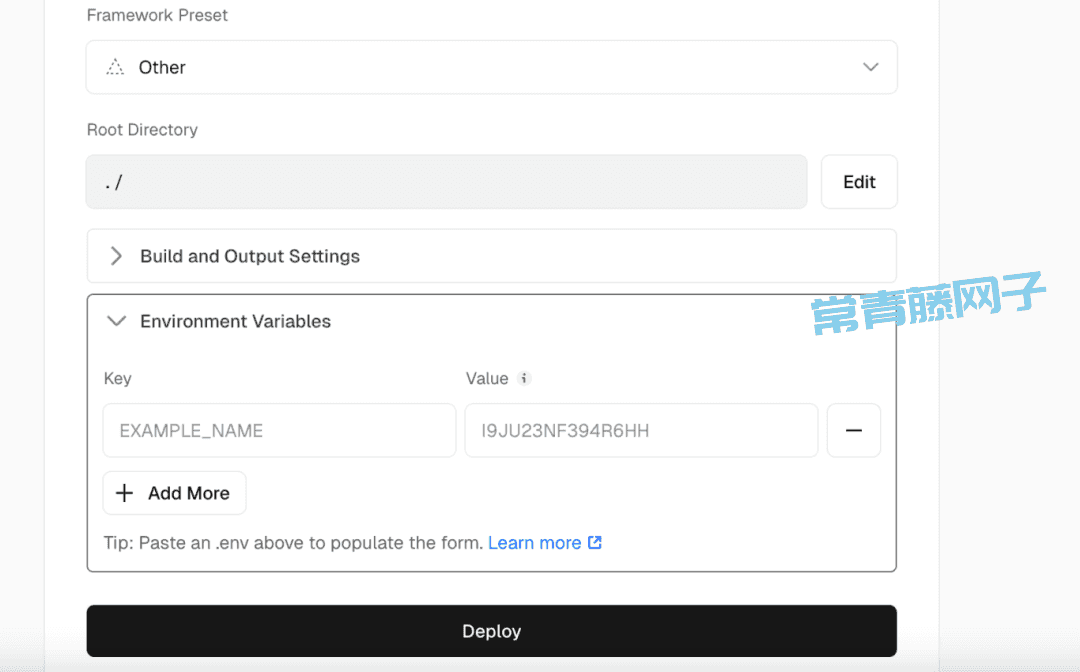
接着打开我们的本地cursor,在部署页面的Environment Variable选项中把本地文件中.env.local里面的内容全部复制进来,然后点击Deploy,等待部署成功就好
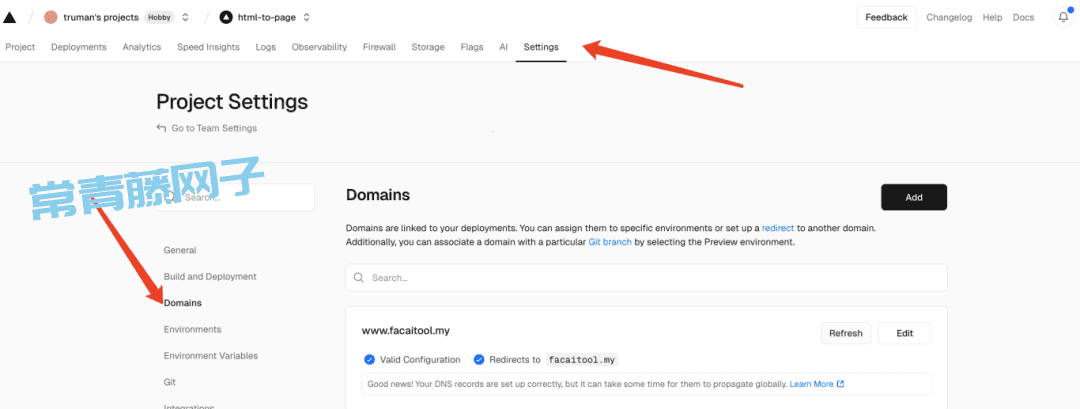
部署成功后,我们需要绑定我们的域名。
我们点进去刚才在Vercel创建好的项目,Settings,然后找到Domain,把域名添加进去就好了
这就是这篇文章的全部内容了。虽然代码看起来很复杂,但是只要我们能够通过自然语言描述清楚我们想要cursor帮我们做什么,流程是什么,那我们不会代码一样可以编程,做出自己想要的软件。
转自:https://mp.weixin.qq.com/s/UZFUDplwTQZJ3P2Jn5nmWg


共有 0 条评论